

This Manual is made for the ALTOX Wbus-4, but the Wbus-5 is same
Tools needed:
Crimp tang
Scissors or hobby knife
Pliers
Phillips screwdriver
Long small screwdriver
Diagonal Cutter or similar
Items you need for install:
Red wire in Webasto pin 2, if not there, use the connector in box, to make one
50 cm of stiff steel wire (to pull the wire to inside of car)
Some 0,50 – 0.75 mm² wire (for connecting the FBH to the Altox)
Isolating tape
2 T-Tap female/male insulated
3 insulated plugs male/female
1 Fuse box with 3 amp fuse
Remember all pictures in the installation guide is from a Left Hand Drive
– disconnect battery
– Start taking it apart
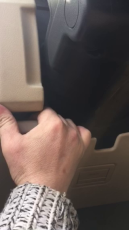

– Unscrew 2 screws on panel under steering wheel, take panel of from top, don’t lose splitters to connect again
– take the panel with light switch of, need to take it from bottom, cause of plastic hinges in top, disconnect it, so you can work with the wires
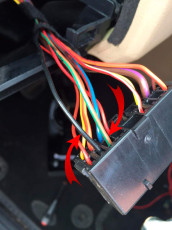
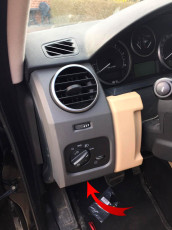
– we are working with the Black wire (ground) and Brown/Green wire (constant 12V) see arrow
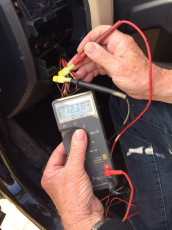
– squeeze the one T-Taps on the black wire and one on the brown/green wire
– You can see we have constant 12 V , just to show, you will not see anything cause your battery is disconnected
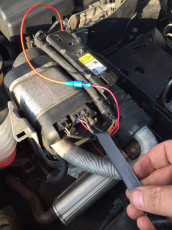
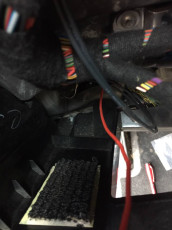
– You need to get the red wire to connect FBH into car
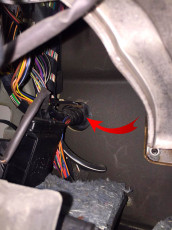
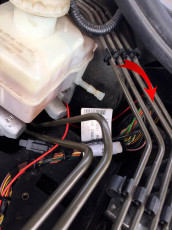

– go through were you see arrow, this is rubber, you can use the small long screwdriver to make a hole from outside
– When you have made a hole all the way through the rubber, remove screwdriver, and you can see where you went through in the rubber from outside
– stick the steel wire through the hole ( I used a small wooden stick on pictures but steel wire is better)
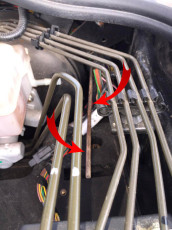

– Then you tie your 0,50 – 0,75 mm² wire on to the steel wire

– And pull it into the cabin
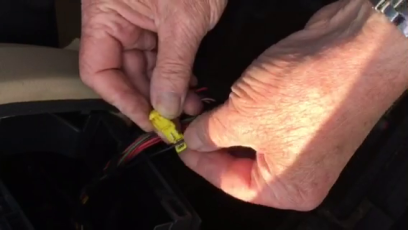
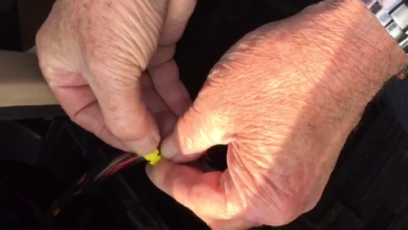
– Then connect the red wire to the FBH


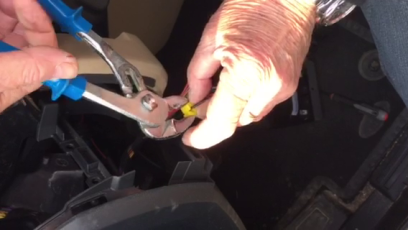
– you squeeze a male Plug on wire from FBH, and female on red wire that goes to cabin
– Put plugs together
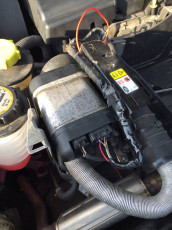
– use the isolate tape to attach it to the other wires, make sure wire runs on top, to keep it from the heat from FBH
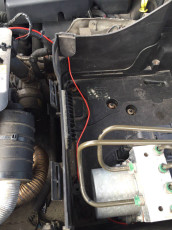
– Remember to have enough wire to be able to drag it nicely in engine room, if you have a LHD you can see picture how to, if you own a RHD just go with other wires behind engine

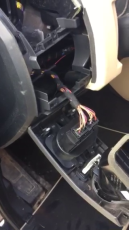
– go back into car to connect the Altox module
– start by preparing the plugs and connectors for the Altox
– The Grey and pink wire on Altox connector are not in use for the Discovery 3
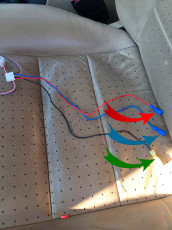
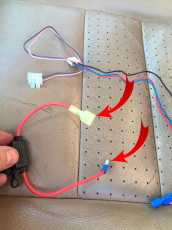
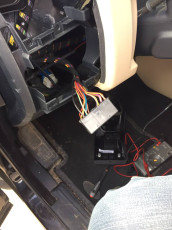
– Take the altox connector squeeze one female plug to red wire “12 V” (Red arrow) and one to the blue wire “WBUS” (Blue arrow)
– You squeeze the male connector for T-Tabs on the black wire “ground” (green arrow)
– Then you take the fuse and connect a male plug in one end (orange arrow), and a male T-Tabs in other end (Black arrow)

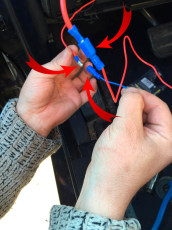
– Connect the Black T-Tap male to female T-Tap on black wire on light switch cable, be sure the connectors go straight in so you get contact (orange arrows)
– Connect the fuse box T-Taps male on to the female T-Taps on the brown/green wire on light switch cable, again be sure it goes straight in to connect (orange arrows)
– Connect the red wire with female Plug from Altox connector to the male plug from fuse box (green arrow)
– Squeeze a male plug on the wire from FBH (blue arrow)
– Connect the blue wire with female plug from altox connector to the FBH male plug (blue arrow)

– Put in your simcard to the Altox, remember to remove access code on sim before install
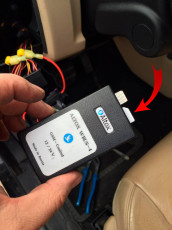
– Stick one piece of velcro on the Altox back side

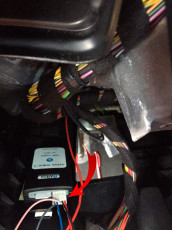
– Connect the connector to the Altox
– stick velcro in, glue it inside behind the dashboard you see fit
– Now you can put the Altox on the velcro.
– Connect cable to light switch and put light switch panel back, wait with the lower panel, just incase you need to get to Altox under setup
– Connect battery
– Now you just need to set up the Altox
– See manual for setup.
– When all is done, put lower panel back, and you are all done.